     |
Subscribe to Our FREE Newsletter
Menus
Recipes
Podcasts
Videos
Articles
Products
Books
Ebooks
Resources
Workshops
About Us

Step-by-Step Fajitas
Fajitas
are one of
those dishes we never grow tired of. Whether we use
Soy Curls or Portabello mushrooms, they always taste delicious. When we owned our own market,
we often fixed these with what we called "discount" ingredients. The dish is pretty forgiving, so it is
a great recipe to use when the mushrooms, onions or peppers are starting to show a little wear.
Soy Curls or Portabello mushrooms, they always taste delicious. When we owned our own market,
we often fixed these with what we called "discount" ingredients. The dish is pretty forgiving, so it is
a great recipe to use when the mushrooms, onions or peppers are starting to show a little wear.

The ingredients for
this dish can
vary greatly depending on the number of mouths you have to feed and
each person's personal preferences. My husband loves lots of
peppers, I love lots of onions, and my children love the mushrooms -
only. As you will see, I prepare the mushrooms in a separate
pan
so my kids can have their fajitas without them being contaminated by
peppers and onions.
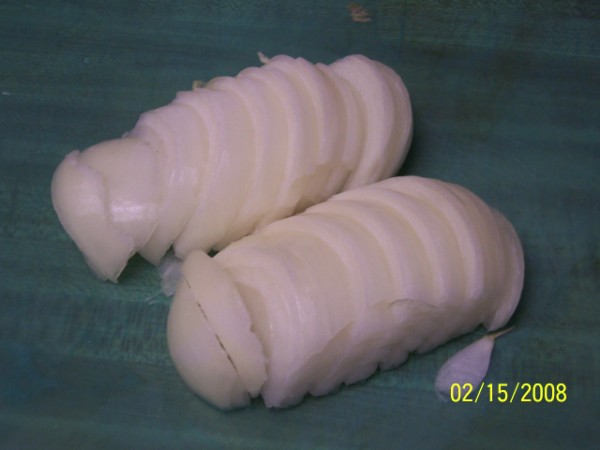
Start with peeling
the onion and slicing it lengthwise to give nice long strips.
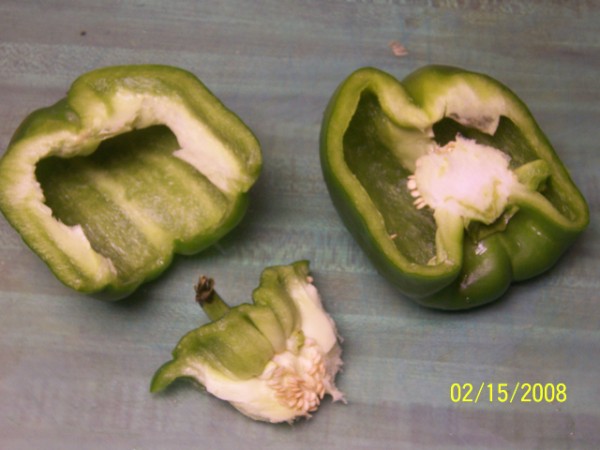
Slice the pepper,
any
color will
do, and remove the seed pod. I used to do this with a knife
and
found that it took more time and involved more risk than snapping the
seed pod out with my fingers.
Rinse the pepper
inside and out once the seed pod is removed.
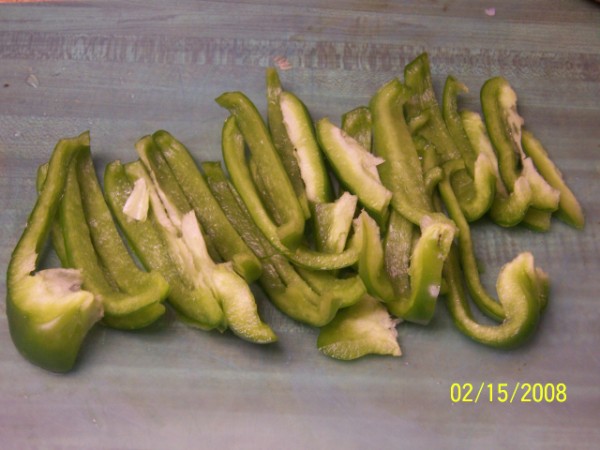
Then slice the pepper into long thin strips.
Then slice the pepper into long thin strips.
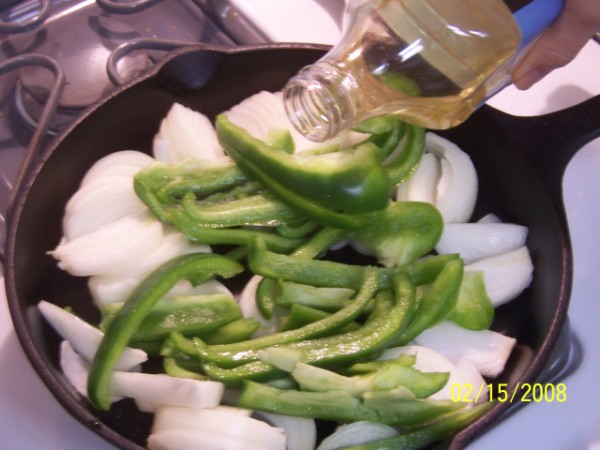
Add onions and
peppers to cast-iron skillet.
Then add some oil which will handle the high heat.
This is one dish where I feel both the cast-iron and a high-heat oil are necessary. I like to cook
my fajitas at a very high heat so I make sure to use peanut oil which can handle the high temperature without smoking. I only use about 1 or 2 tablespoons of oil.
This is one dish where I feel both the cast-iron and a high-heat oil are necessary. I like to cook
my fajitas at a very high heat so I make sure to use peanut oil which can handle the high temperature without smoking. I only use about 1 or 2 tablespoons of oil.
A quick comment on
cast-iron skillets. There is nothing like a cast iron
skillet.
It is the original non-stick cookware and a must-have for kitchens. It
handles very high heats and cooks and browns at the same time.
(A good
cast iron skillet is also GREAT for cooking cornbread in
the oven. Nothing else makes the cornbread moist on the
inside and
"crusty" on the outside.)
MMMMM....Almost
done.
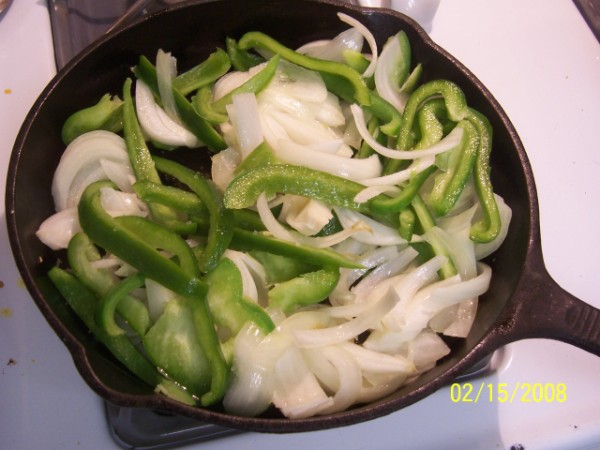
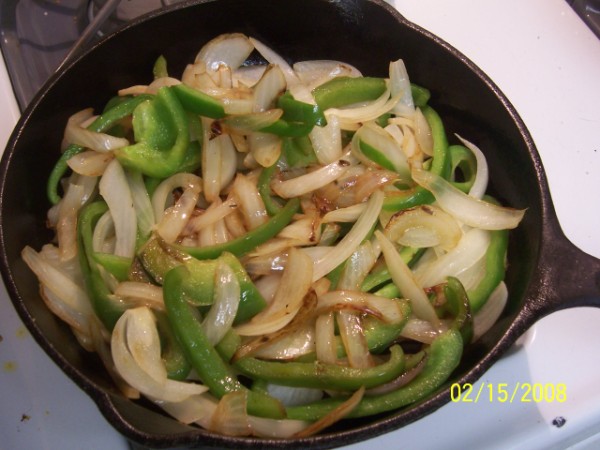
Make sure to stir the
mixture occassionally while cooking. Sometimes,
I will place a lid on top to help hold the heat and soften the peppers and onions quicky. If you like
your fajitas with a little more texture, you could stop when they look like this. We like ours a little softer so I will let them cook for about another 2-3 minutes.
I will place a lid on top to help hold the heat and soften the peppers and onions quicky. If you like
your fajitas with a little more texture, you could stop when they look like this. We like ours a little softer so I will let them cook for about another 2-3 minutes.
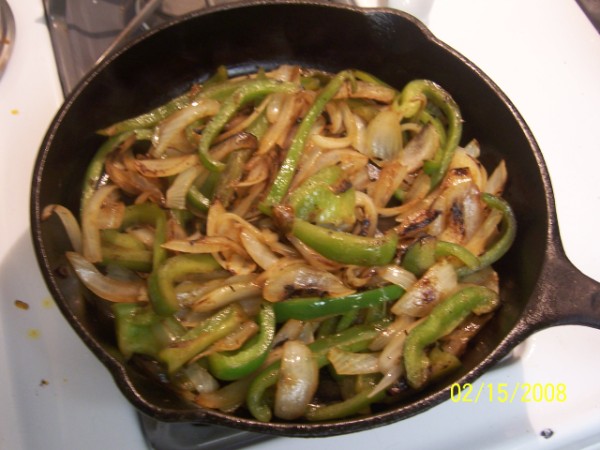
Now we're talking
scrumptious! These look
perfect! Nice and carmelized and ready for eating.
Time to
remove them from the pan. Remember that I cook my peppers and
onions separately from the mushrooms because my kids don't want peppers
and onions on their fajitas.
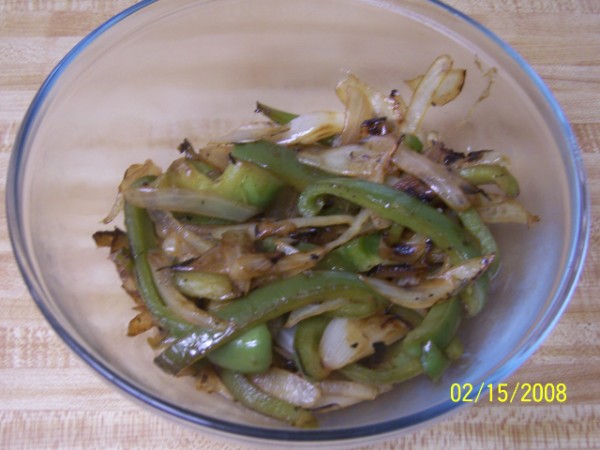
Time to remove the
peppers and onions and get them
ready for serving. If I wasn't going to make some portabello
mushrooms, I would serve these in the cast iron skillet. Serving
them at the table from the skillet keeps them warm longer and looks so
authentic! But tonight, a nice bowl will have to do!
Now for the mushrooms!
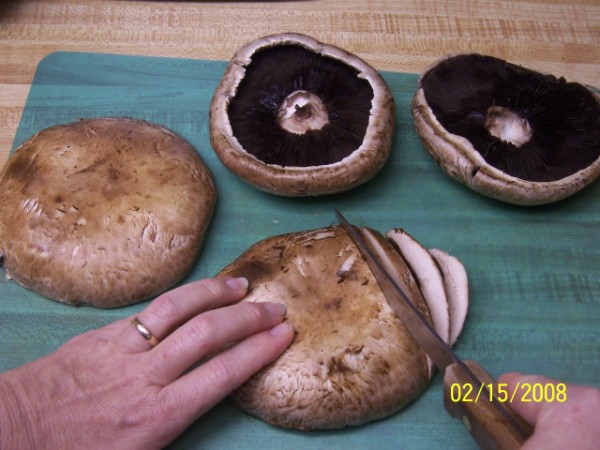
Start with some portabello mushrooms which are nice and firm
and
not slimy. (If yours have gone a little limp, it's okay to
still
use them. In this dish, you won't even notice!) I
give my
mushrooms a quick rinse under running water and shake off the excess.
True mushroom gourmets will probably tell you not to do this
-
but it works for me. Taking the time to gently wash the
mushrooms
or rub them - well, that just takes too long! Since I am
going to
be frying these up, I don't bother to remove the "black gills"
underneath the cap. Some recipes will call for this, however,
unless you are really concerned about the appearance, don't bother.
Make sure to slice the mushrooms nice and thin. I
like to
cut mine to approximately the same size as the peppers and onions.
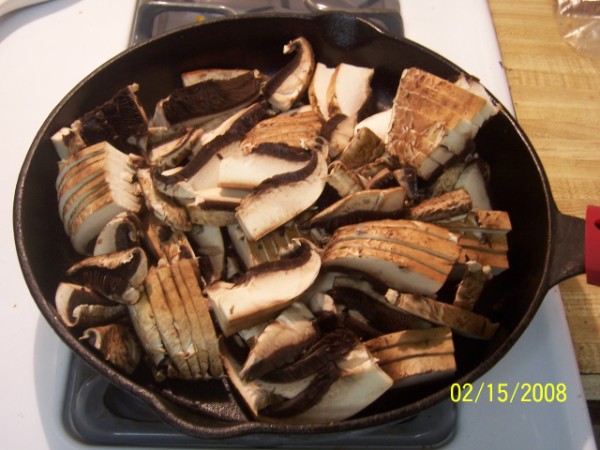
Place the
portabellos
in the cast iron pan you
just used for the peppers and onions. Sometimes I will
add a little more oil, but they generally don't need it. The little bit of water left after washing the mushrooms is enought to get them started. Once the portabellos begin to heat up, they will release quite a bit of water and they won't stick to the pan. Usually I cover the pan with a domed lid for a few minutes to help hold the heat in and get the portabellos nice and hot quickly. Stir them a few times while cooking and remove them before they get too limp.
add a little more oil, but they generally don't need it. The little bit of water left after washing the mushrooms is enought to get them started. Once the portabellos begin to heat up, they will release quite a bit of water and they won't stick to the pan. Usually I cover the pan with a domed lid for a few minutes to help hold the heat in and get the portabellos nice and hot quickly. Stir them a few times while cooking and remove them before they get too limp.
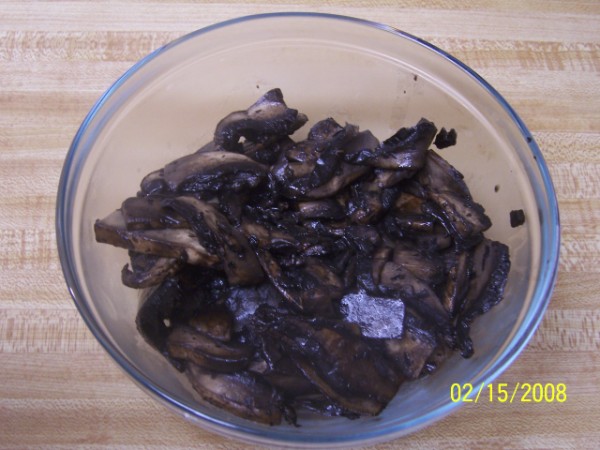
Wow!
These
look great and ready to stuff a
big fajita! My kids love these portabellos by themselves
in their fajitas. My husband and I include a large portion of peppers, onions, guacamole and salsa!
My mouth is watering just thinking about it!
in their fajitas. My husband and I include a large portion of peppers, onions, guacamole and salsa!
My mouth is watering just thinking about it!

"Wisdom From the Kitchen" | Veg4Health.com Melbourne Florida

